In this article I describe how I replaced the electrical connectors on both my RadRunner e-bike battery and the battery base plate. I’ve had my RadRunner for four and a half years and have used it primarily for car replacement for commuting and grocery runs. While it’s been dependable and trouble free until now, I had an issue where there was some electrical arcing in the battery connector that damaged it. This could have been caused by debris in the connector or perhaps it just wore out. I noticed the problem when I went to remove the battery pack and it felt stuck in the base plate. Upon removing the battery pack, I could see that the connectors were damaged with one pin and corresponding socket damaged from the arcing. New batteries are $600 and the base plate is also an additional unknown amount (price isn’t listed on Rad’s website). Since the battery is otherwise functioning fine and way out of warranty, I decided to attempt to repair the connectors myself.
This information is provided solely as a historical account of what I did. Work on e-bike electrical systems should only be performed by skilled professionals. Damage, improper modification or repair, or accidents from working on batteries or electrical systems can result in fire, explosions, injury, or death.
Tools and Materials Needed
- Hailong 5 pin Connector Pair
- typically ~$5 from e-bike parts suppliers, I bought mine on Amazon for $13 with Prime overnight shipping and returns if needed
- Liquid Electrical Tape
- Soldering Iron and Solder
- Wire Cutter and Stripper Tools
- Phillips Head Screwdriver
- 4 mm Allen Key
- Cable tie (zip tie)
Replacing the Connector on the Base Plate
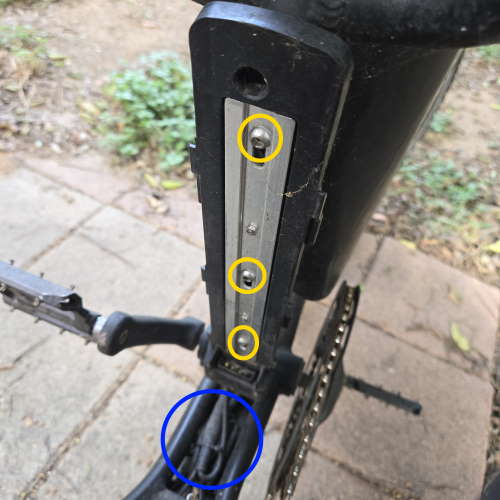
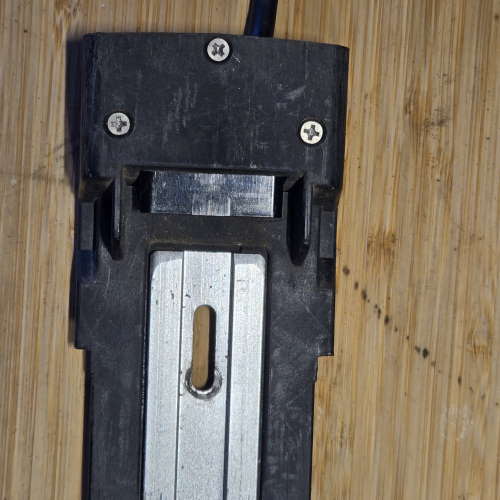
First, I removed the battery mounting baseplate from the bike. On the RadRunner, it is secured to the seat tube with three 4 mm bolts and a cable exiting the bottom connects to the bike’s electrical system. I disconnected the cable at the bottom by pulling the connector apart after removing the cable tie. I then removed the three 4 mm bolts.
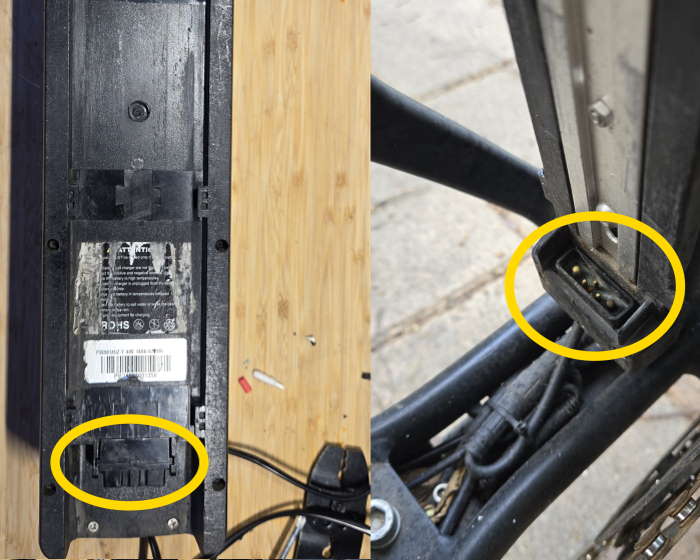
The connector is secured to the base plate with three Phillips head screws. After removing the screws, the connector and its housing can be removed from the base plate.
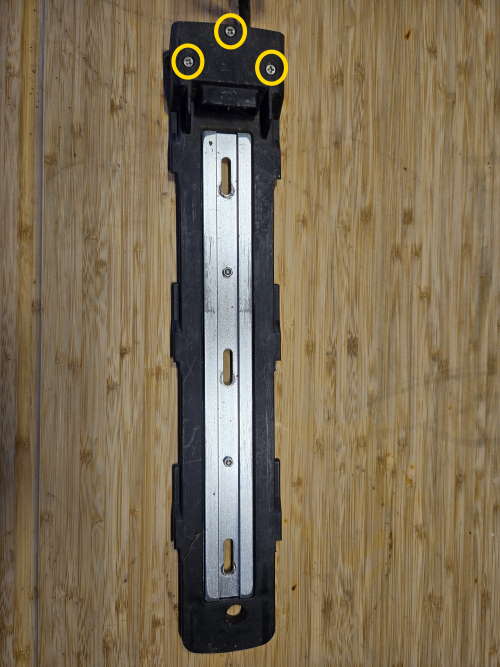
The connector then slides up and out of the housing and the housing can be slid down the cable and out of the way. I clipped the red and black wires at the point where they were soldered to the terminals.
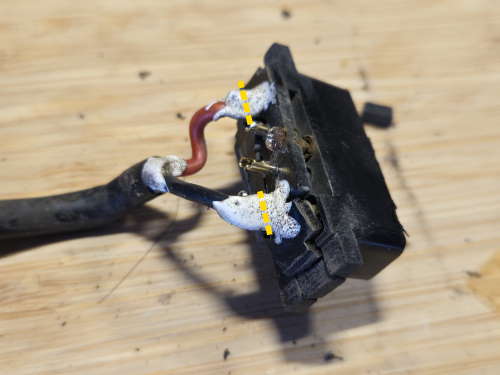
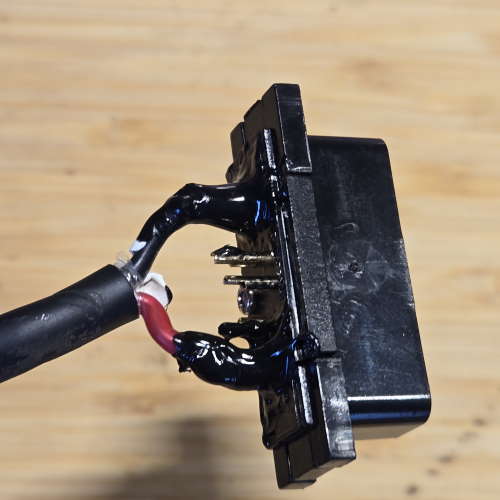
Next, I stripped the red and black wires back a bit and soldered them to the terminals on the new connector. I made sure to connect the cables in the same orientation as they were previously connected.

I allowed the newly soldered connections to cool down and then coated them with liquid electrical tape to insulate the new connections.
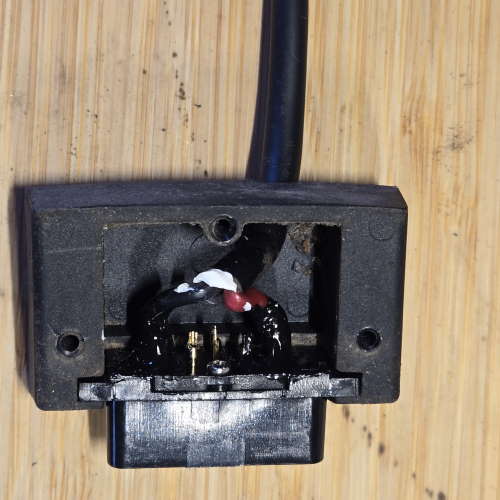
I reassembled the base plate by simply doing the reverse of the disassembly (sliding the connector back into the housing and securing it to the base plate with the three Phillips head screws).
The base plate was re-installed on the bike with the three 4 mm bolts. The cable was reconnected and tidied up with a new cable tie.
Replacing the Connector on the Battery
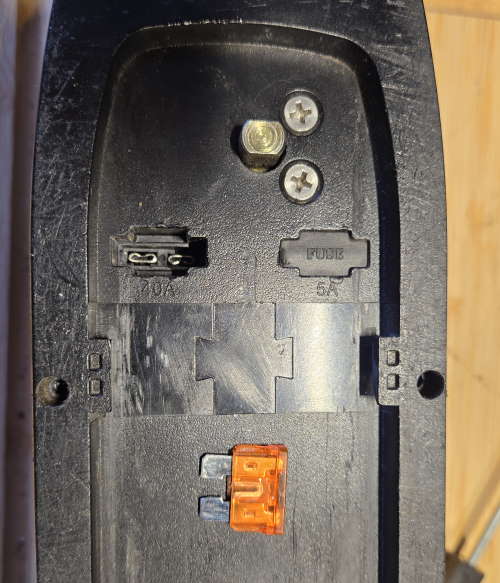
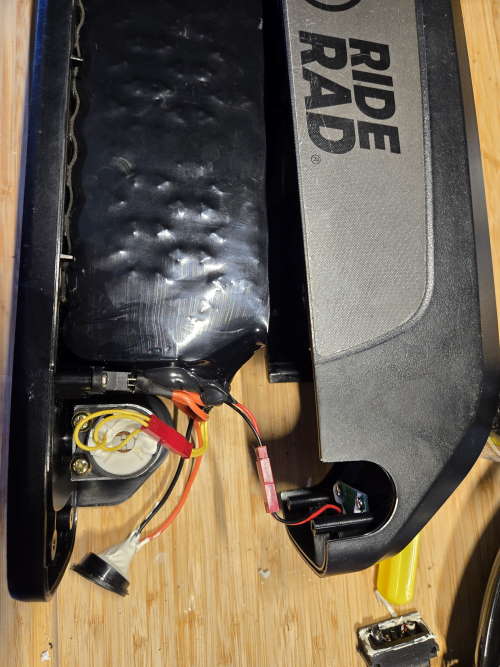
Replacing the connector on the battery was a bit more involved, but not overly complicated. On the underside of the battery pack are the screws that hold it together and access to the fuses. The Rad battery pack has two fuses which can be removed by prying up the covers and pulling the fuses out. After removing the fuses, I removed the eight outer and two bottom Phillips head screws that hold the battery case together.
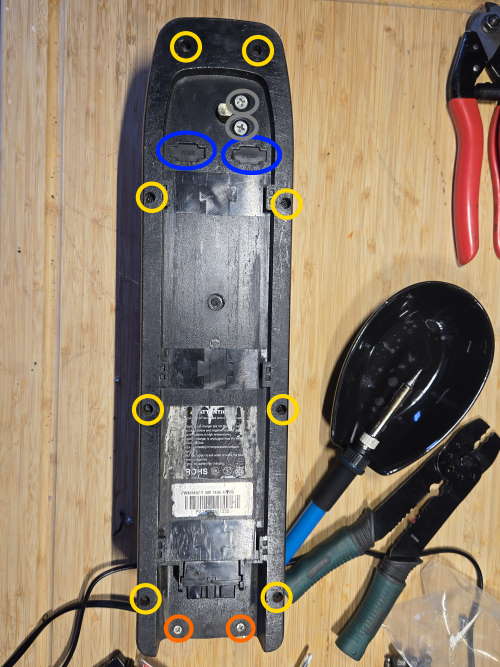
I then flipped the battery pack back over and lifted the top cover up. There are wires running to the battery indicator on the cover that need to be disconnected by pulling apart a connector before completely removing the top of the battery case. I also removed the keyed ignition lock by removing the two securing Phillips head screws on the bottom side of the battery case and pulling apart the wired connector. I then removed the ignition lock mechanism and set aside.
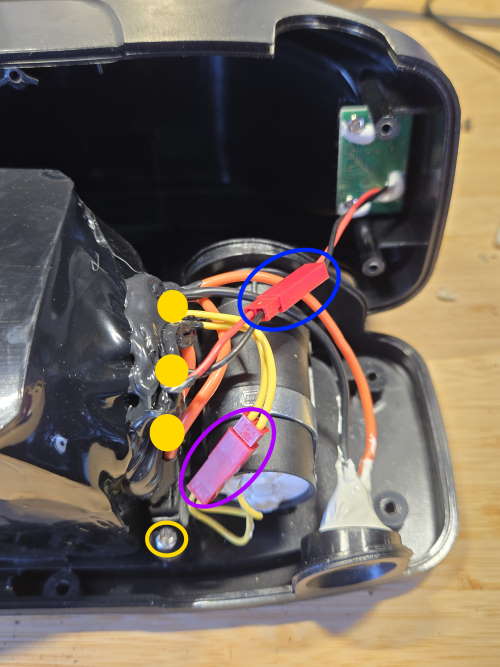
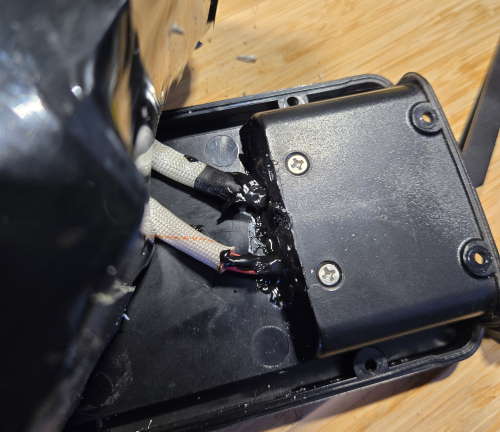
The fuse sockets and associated wiring connected to the battery cells is secured by four Phillips head screws which I removed. The mass of battery cells is glued to the base and I removed it (along with the wiring and fuse sockets) by carefully pushing it back and forth to break the connection of the adhesive. I was then able to access the red and black wires that run to the connector underneath. I snipped the red and black wires flush where they connected to the old terminals.

I removed the two Phillips head screws securing the old connector. There was some sealant and insulating compound around the old connector that I scraped off before being able to slide the old connector out. I slid the new connector in and secured it to the bottom plate with the two Phillips head screws.

I stripped the red and black wires back enough to connect to the new terminals. I soldered the wires to the new terminals making sure to connect in the same orientation as before. After cooling, I coated the new connections and the area surrounding the new connector with liquid electrical tape to insulate the connections and seal the area.
Reassembling the battery pack was straightforward by just reversing the disassembly steps. The adhesive remaining on the bottom of the battery cell mass felt sufficient to attach back to the the bottom plate. After reinserting the four Phillips head screws at the fuse sockets, I re-attached the ignition lock mechanism with the two Phillips head screws on the underside of the case. I then re-connected the cables for the ignition lock mechanism and the battery indicator.
Making sure to have the the external charging port and ignition lock mechanisms aligned in the outer casing grooves, I closed the battery casing and inverted. I re-installed the eight outer and two bottom Phillips head screws that hold the battery case together. I reinserted the fuses and fuse covers to complete the re-assembly. Finally, I waited for the liquid electrical tape to cure before testing the repaired battery connectors.
Parting Thoughts
Repairing the connectors was a success and I am continuing to use this battery. Total cost for repair was ~$13 and an hour of my time to perform the repair. This should allow me to get the remaining usable life out of the battery and save me the cost of replacing the entire battery base plate and buying another battery now.